The production phase of the 'Senator Gracchus' Game Character has not been as long as I would have hoped it to have been due to the loss of a working PC however I feel as though it has taught me a lot about the flow of an efficient production pipeline. Over the last week I have documented my progress at key points within the production by taking screenshots which gives me an idea of how I can efficiently carry out the pipeline and also how to cope with the pressure of the 'shipping date'.
CONCEPT
The conceptual stage played a key role in the production and in a way my PC dying on me helped me to appreciate the amount of concise planning and thought that needs to go into anything you are trying to create whether its a character, setting, creature etc. As I was working with a programmer for the project, the character was made to suit his brief which turned out to be a Roman senator during the rule of Emperor Nero and the Great Fire of Rome in 64 AD.
This meant that I had to bear in mind all the elements that would go into creating the character and how that would be implemented through the different stages of the production for example the fact that he is a senator means that his posture would be quite poised and upright with nobility, understanding this much about the characters personality helps to figure out how his walk cycle would be which can then be pre-planned and timed in order to push through the animation phase of the production efficiently. It would also help to plan for other steps of the production such as planning a rig that had the right capabilities to create animations that would portray the personality of the character. I've had to bear in mind other issues such as time management and so that would also play a part as I have had to make decisions about how long I can allow myself for each phase of production and so by design I've kept it as simple as possible with the time I've had.
At the beginning of the concept I painted 3 different concepts of the senator based of references from movies and internet images.
This helped to get an initial feel of the character visually based off a few personality traits that was in the brief and what was discussed. I presented the 3 concepts to my programmer who told me the parts he wanted to keep and the parts he wanted to get rid of. We came to an agreement and I went on to work on the head and the body separately.


I found the use of templates an extremely fast way of drawing up different variations of the head and body. This helped me pass quickly through the design stage as I drew up different design sheets within hours and emailed them back across to my programmer who would give his feedback and then it was just a case of going back to the drawing board and tweaking a few things. The above 3 templates were for the shape of the head. I drew them up as simple shapes that would be easier to model yet I do still feel the lack of human skull study did hold me back slightly. With the 3 head shapes I simply drew different facial features and hairstyles (beards too) and sent them back to Darminder (my programmer) and feedback etc etc etc.
In a nutshell this technique made things work A LOT faster!
After creating 5 different costume concepts (again through the use of templates) I discussed it with Darminder who gave his feedback. His feedback was that he liked the general feel of Outfit 4 but without the arm stripes. He also requested that the final design follow the colour scheme of Outfit 2 and asked for a scar on his neck showing that Emperor Nero tried to have him assasinated. With all this it was back to the drawing board to produce a finalised costume idea that would not only suit Darminders requests but also a symmetrical model with simple body form so that the modelling process could be alot quicker.
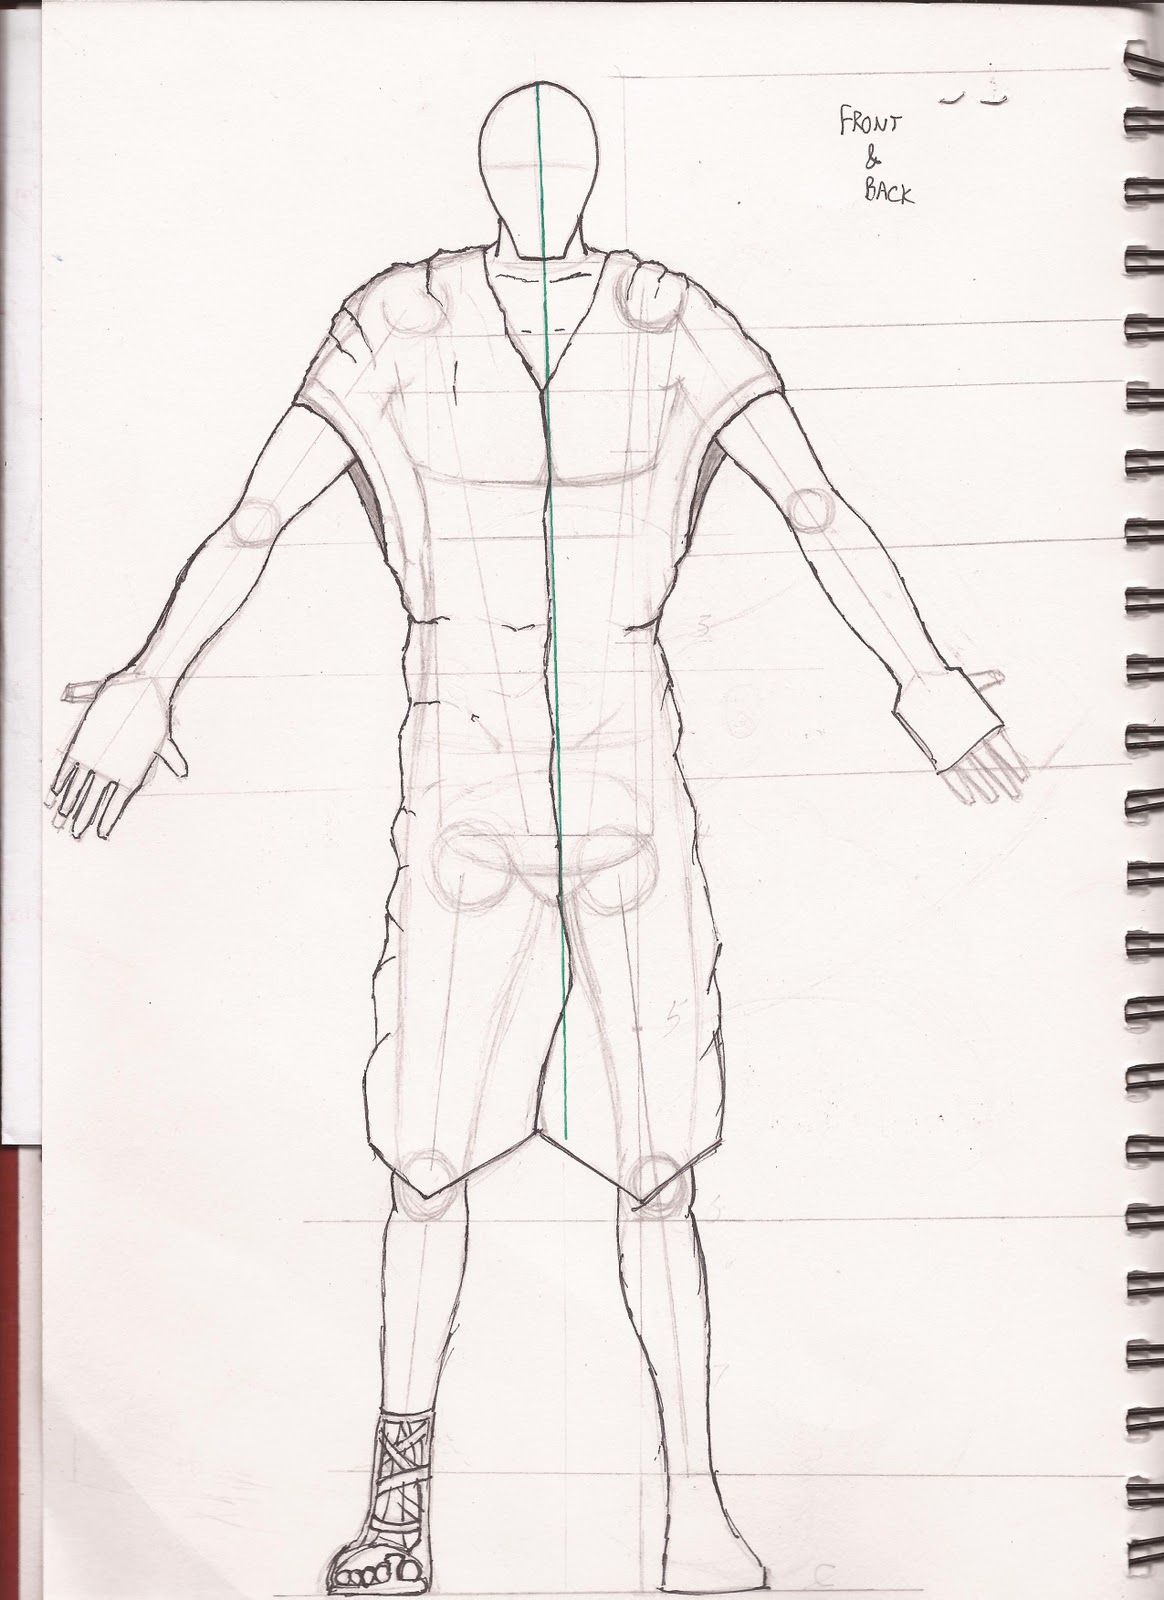
After drawing out the final concepts for the body I also drew a side and back profile that would later prove useful in the modelling stage. The next step was to begin turning these concept drawings into blueprints. The first thing I had to figure out accurately was the proportions of the Senator.
These would also provide me with templates to figure out:
- Model Topology. By drawing out the basic mesh of the geometry I could then begin to figure out were key areas would be such as certain edge loops around the elbows and knees to allow good deformation during the animating.
- Extra props and their placements. This allowed me to draw on extra geometry that would be added all as either symbolic or practical use to the character. Things such as drawing his belt and then planning how to model the belt and where it would be on the main body.
- Texture. By painting texture maps on the templates It acted as reference material that allowed an efficient practice that definately saved time during painstakingly long texturing process.
- Rig & Joint placement. This helped me figure out how to build up a rig that would work well enough to create the animations that are required. It also helped me to document progress through the rigging with instructions on creating the rig.
Back profile blueprint.
Front profile blueprint. The area highlighted in green represents that the model will be created as half a model and then using Mirror Geometry tool to build up the other half. This technique saves alot of time.... especially when time is of the essence.
Side profile blueprint. The red crosshatched area represents the faces that will be extruded to create the arms.
Figuring out where the props would be placed and also notes on how I could possibly model the geometry.
The texture for the main body of the geometry which is the Senators Robe. I also thought about skin colour and mixed a couple of watercolours to try get a feel for the skin. The other thing i've made note of is the robe will have ash and soot marks as he is in a burning building.
Using the same method for the body which I found to work effectively, I implemented it into the head and hair design.
Using the head sheets and the head shape me and Darminder decided on I created another template. This one helped me figure out how I was going to model the head. At this point I still felt that using Extrusion on edges to create a head as a separate piece of geometry would be the easiest and most effective way to do it however I learn't later on that this way would cause way too many problems when making a low poly model but we will get to that later....
The hair also posed a difficult challenge to try and design as I couldn't make an informed judgement or run a test piece on Maya however after careful thought I decided it would be best (and quicker..always got to keep that in mind with this project) if I selected the faces of the head and extruded them to create the hair and beard and then tweak the vertices to give it the final shape.
I wanted to establish the basic shape of the hair and to help myself from getting confused over how many fringes he is going to have I systematically named each point and drew a side profile aswell to help me gain a clearer understanding.
Finally I planned the texture of the face by painting with watercolour onto the templates.
I also went on to do some blueprints for the rig setup and also some animation timings and notes which can all be found in my RVJ.
PRODUCTION
Without the use of a PC my production time was cut to just over a week. This meant that I had to move fast and prioritise certain aspects of production.
Using the blueprints for the body I began on creating the basic body geometry. The method I used was the same method as I had used previously in the Maya for Games tutorial when I created the soldier body in week 3. By only creating half the geometry I was saved half the work as my design was symmetrical to save time.
In a separate scene file I began modelling the head using a method that required me to extrude the edges to create the geometry of the head. Starting from the eyes and then moving on to the nose. This method I also learnt in week 3 from the Maya for Games tutorial.
The head from a frontal view and side view.
As I carried on working on the head I checked the face normals to make sure they were all facing the right way as I had been extruding my edges in all axis. The face normals basically show which side of the face will render within a game engine.
The head was created and I realised that a few issues were going to cause me major problems later on. The first and foremost issue was that were too many polys in the head and attaching it to a low poly body wouldve been a nightmare. This left me with 2 options; either I made the body more high poly by adding more edge loops running into the neck or I remodelled the head on a much more low poly scale. After considering the pros and cons of both ways I decided to go with a remodel.
This would've been a nightmare to attach as the amount of edges in the neck of the head geometry and the body geometry did NOT match up.
By smoothing out the head I could see which areas needed to be more recessed such as the eyes and which other areas needed tweaking in the 'low poly' mesh such as the bridge of the nose needed widening.
the eye sockets are well placed but a bit skeletal, you might want to think about broadening the bridge of the nose, also the lips are currently a bit big. The face seems to come to a sharp point where the you've mirrored it, try smoothing ...this out so the entire face is curved evenly. I would also recommend modelling the lips with a whole where the mouth is and then move the lips into a closed position. (Facebook Feedback)
I decided to scrap the head and model it again but by extruding the neck on the body geometry and then blocking it out from a cube. Then by adding edge loops around the head to create the contours of the eyes, nose and mouth I carried on re-working into the head.
Adding the hands to the body. I imported the hands I had created in Week 3 without the rig and then using combine mesh and merge vertices I attached them to the arms using existing edge loops and finally deleted the excess edges out the hands.
In the Animators Survival Kit by Richard Williams it explains how silhouettes play a big part in the audiences ability to read the character so I felt it would be a good idea to have a look how my character looked as a silhouette and if the readability of it was instantaneous.