To help me with modelling the character I needed abit more learning resource and so I looked at a few online tutorials and found this one particularly useful. Combining this tutorial with what I had learnt last week I managed to quickly model a female character without the head and hands by the end of Monday in the space of about 8-9 hours.
http://www.creativecrash.com/maya/tutorials/character/c/real-time-character-modeling-tutorial
I felt much more comfortable with the modelling tools in Maya and I feel as though I have developed a further understanding into modelling systematically for example going from a block stage model to achieving a roughed out figure to working in the details and I felt that many tools such as the Insert edge loop and Split polygon tool (Known as Interactive Split tool in Maya 2012) can help model effectively when its uses are understood within 3D space. I wanted to focus more on the modelling aspect as opposed to character design which is why I based my model off an accurately proportional sketch of a woman.

From 2D (above) to 3D (below)


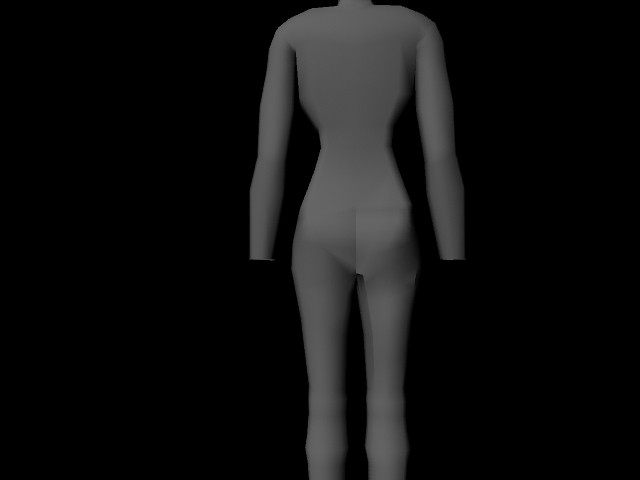


These images show my Female model from different profiles. By the shapes and characteristics I would definately say that as an audience you can tell it is a female which I confirmed by asking various people again Via Facebook. A few critical points I have to say for the model:
- The waistline goes unnaturally thin as it approaches the navel area and needs to be a more rounded and smooth curve.
- The backside area needs more definition and again a more rounded and smooth outcome.
- The thighs in comparism to the knees do not have enough difference in broadness and generally the thigh area needs greater definition.
- The breasts are too large and when compared to the hips makes the model unnatural.
- The shoulders are too broad and need to be narrowed to give her a more feminine look.
On the plus side however.... she DOES look like a woman so overall I do have to say it has been a good attempt and with only 1600 tris its a good start to creating a low poly model. In terms of the topology of the model although it does look pretty symmetrical and fairly even there are areas that need improvement or atleast more consideration when it comes to remodelling next time.
Here is a few low poly models used for a MMO called Allods online which was posted on a forum by one of the artists. http://www.polycount.com/forum/showthread.php?t=74450


These models range between 3000 - 6000 Tri's yet they hold so much form and detail. This is something I believe is achievable for my own project and all the texture/shadow/detail is all simply 1 texture map with all of it painted onto one file in photoshop in seperate layers, no spec maps etc.
Which leads me on to Wednesday - Thursday which I focused soley on texturing. Texturing is the one process that I really found difficult and very hard to get my head around which is strange and I come from a textile manufacturing family background however its not quite the same I suppose in 3D software however there are theoretical similarities such as knowing where to put seams and were to sew the UV edges. Pre-Wednesday I also did not understand what a UV was entirely so I did some research online and found a great definition.
'This process projects a texture map onto a 3D object. The letters "U" and "V" are used to describe the 2D mesh because "X", "Y" and "Z" are already used to describe the 3D object in model space.
UV texturing permits polygons that make up a 3D object to be painted with color from an image. The image is called a UV texture map, but it's just an ordinary image. The UV mapping process involves assigning pixels in the image to surface mappings on the polygon, usually done by "programmatically" copying a triangle shaped piece of the image map and pasting it onto a triangle on the object. UV is the alternative to XY, it only maps into a texture space rather than into the geometric space of the object. But the rendering computation uses the UV texture coordinates to determine how to paint the three dimensional surface.' (www.wikipedia.org) Thanks wiki :)
With my head now around what a UV was I could then go on to the mapping the UV's on my model. This was a painstakingly long process and took the combined effort of book and online tutorials as well as a lot of trial and error.

When I finally did manage to unwrap my UV edges successfully in the UV Texture editor I found that too many seams in the texture would make it difficult to match up all the edges correctly by the colours and it was likely to show up when rendering, particularly if the seams ran through the middle of the model.

Thinking about the positioning of the seams is important and I think that for future projects I should definately bear this in mind when modelling or even designing the character however I did learn there are a few tools that can help you avoid this.

One of these tools being the Sew Uv edges which cuts down the number of seams therefore allowing a cleaner texture.
My final learning curve of this week was not so much something I had learnt in Maya but rather a practical issue. It is vital to save important work to 2 separate locations just in case one file becomes corrupted and also its good to keep hardware running as smoothly as possible i.e laptop as mine crashed and was out of commission for 4 days which really pushed me back on my schedule. This coming week I will focus solely on the rigging process and how the research of anatomy can help me achieve greater and more realistic rigs.
A great blog, it has a lot of useful information to me
ReplyDeleteVillage Talkies a top-quality professional corporate video production company in Bangalore and also best explainer video company in Bangalore & animation video makers in Bangalore, Chennai, India & Maryland, Baltimore, USA provides Corporate & Brand films, Promotional, Marketing videos & Training videos, Product demo videos, Employee videos, Product video explainers, eLearning videos, 2d Animation, 3d Animation, Motion Graphics, Whiteboard Explainer videos Client Testimonial Videos, Video Presentation and more for all start-ups, industries, and corporate companies. From scripting to corporate video production services, explainer & 3d, 2d animation video production , our solutions are customized to your budget, timeline, and to meet the company goals and objectives.
As a best video production company in Bangalore, we produce quality and creative videos to our clients.